
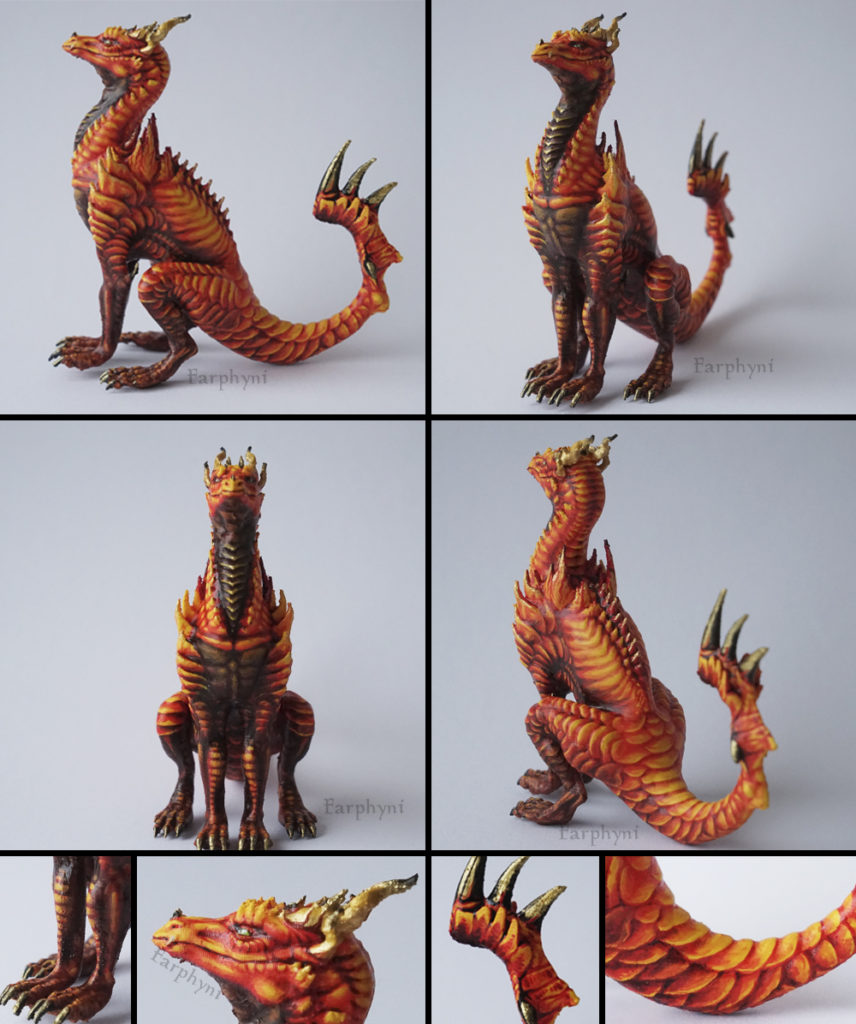
First print of the fullbody model.
When I was younger I always wished that the dragons I drew would awaken, jump off the paper and become alive. I’d love to have a pet dragon when I was a child. Now I have one and soon even more! 😉
Some years ago I tried modelling clay, which was nice for sure, but couldn’t achieve the results I was looking for. Now I’ve found my way of doing threedimensional art: digital 3D models and printers. The details one can achieve there outcompete regular modelling for me! 3D Printers really are amazing tools for artists. Still rather expensive, but amazing!
Anyway. This model is named “Salvador” and was mainly used to test the printing process with a more complex model. After the first print I adjusted the model and started further prints. Salvador won’t be printed again, but the overworked model will (that will be presented in another Blog Post during the next days).
As mentioned, this time I used a different 3D program, Sculptris, which appeared more ‘natural’ and intuitive for creature-models than Blender, which I’ve used before. It was amazingly easy and relaxing to create the model. The coloring of the model took several hours due to many layers, shades and fine details, but was also a lot of fun and I look forward to further models.
Afterwards I decided to make the horns and some spikes larger/different to ease removal of the supporting elements a little. Also, I placed the tail a little lower so it is on the same height as backfeet and forefeet. (You’ll see some photos in the next blog post)
Further information about the model:
SALVADOR:
-3D Program: Sculptris
-3D Printer: Prusa i3 MK3
-Printing Material: PLA, 20m of material needed
-Heigth: ~ 13cm
-Length: ~ 12cm
-Breadth: ~ 5,5cm
-Fill Density: 20%
-Resolution: highest res
-Printed with supporting elements (which were removed after printing)
-Print Time: nearly 40 hours
-Painted with Vallejo Game Colors
It’s awesome^^
I think you could spare nearly 10h of printing time by reducing the infill to 15%, although I’m not sure of the effects on the final product (I suppose they would be minimal, as there is no special need for mechanical resistance)
Thank you 🙂
Fun fact: removing the supporting elements or reducing the infill barely changes the printing time. It’s the resolution that has the greatest impact. I made a testprint (one third smaller than Salvador) that would have needed a printing time of about 15 hours with the highest resolution (details: 0,05mm) and with the second highest resolution (0,1 mm) it only took 5-7 hours – and even with the second highest resolution all fine details were there and nicely clear, all scales and spikes how they were supposed to be. With supporting elements it was only a few minutes longer – what actually surprised me, as I thought they’d take their time^^, but no, it’s really the resolution that’s majorly influencing the printing time.
I knew for the supporting elements but not for the infill. Back in the past it was both the resolution and infill that had a lot of influence on printing time, maybe the software are more intelligent now. However, you can still spare material with infill reduction 😉